PCB Board Resistor Presence Detection
Project Background
Measurement Background
With the development of the electronic manufacturing industry, electronic products tend to be multi-functional, intelligent, and miniaturized. As important precision components in electronic products, the quality of components on PCB boards directly affects product performance. Therefore, quality control has become particularly crucial.

Camera Selection
Hypersen-DBL
Measurement Items
Detect whether the chips on the PCB board are installed in place, and simultaneously check for missing soldering of resistors in designated areas.
Detection Requirements
- Measurement accuracy ≤ 0.01mm
- Measurement repeatability ≤ 0.01mm
- Measurement cycle ≤ 1s
Solution
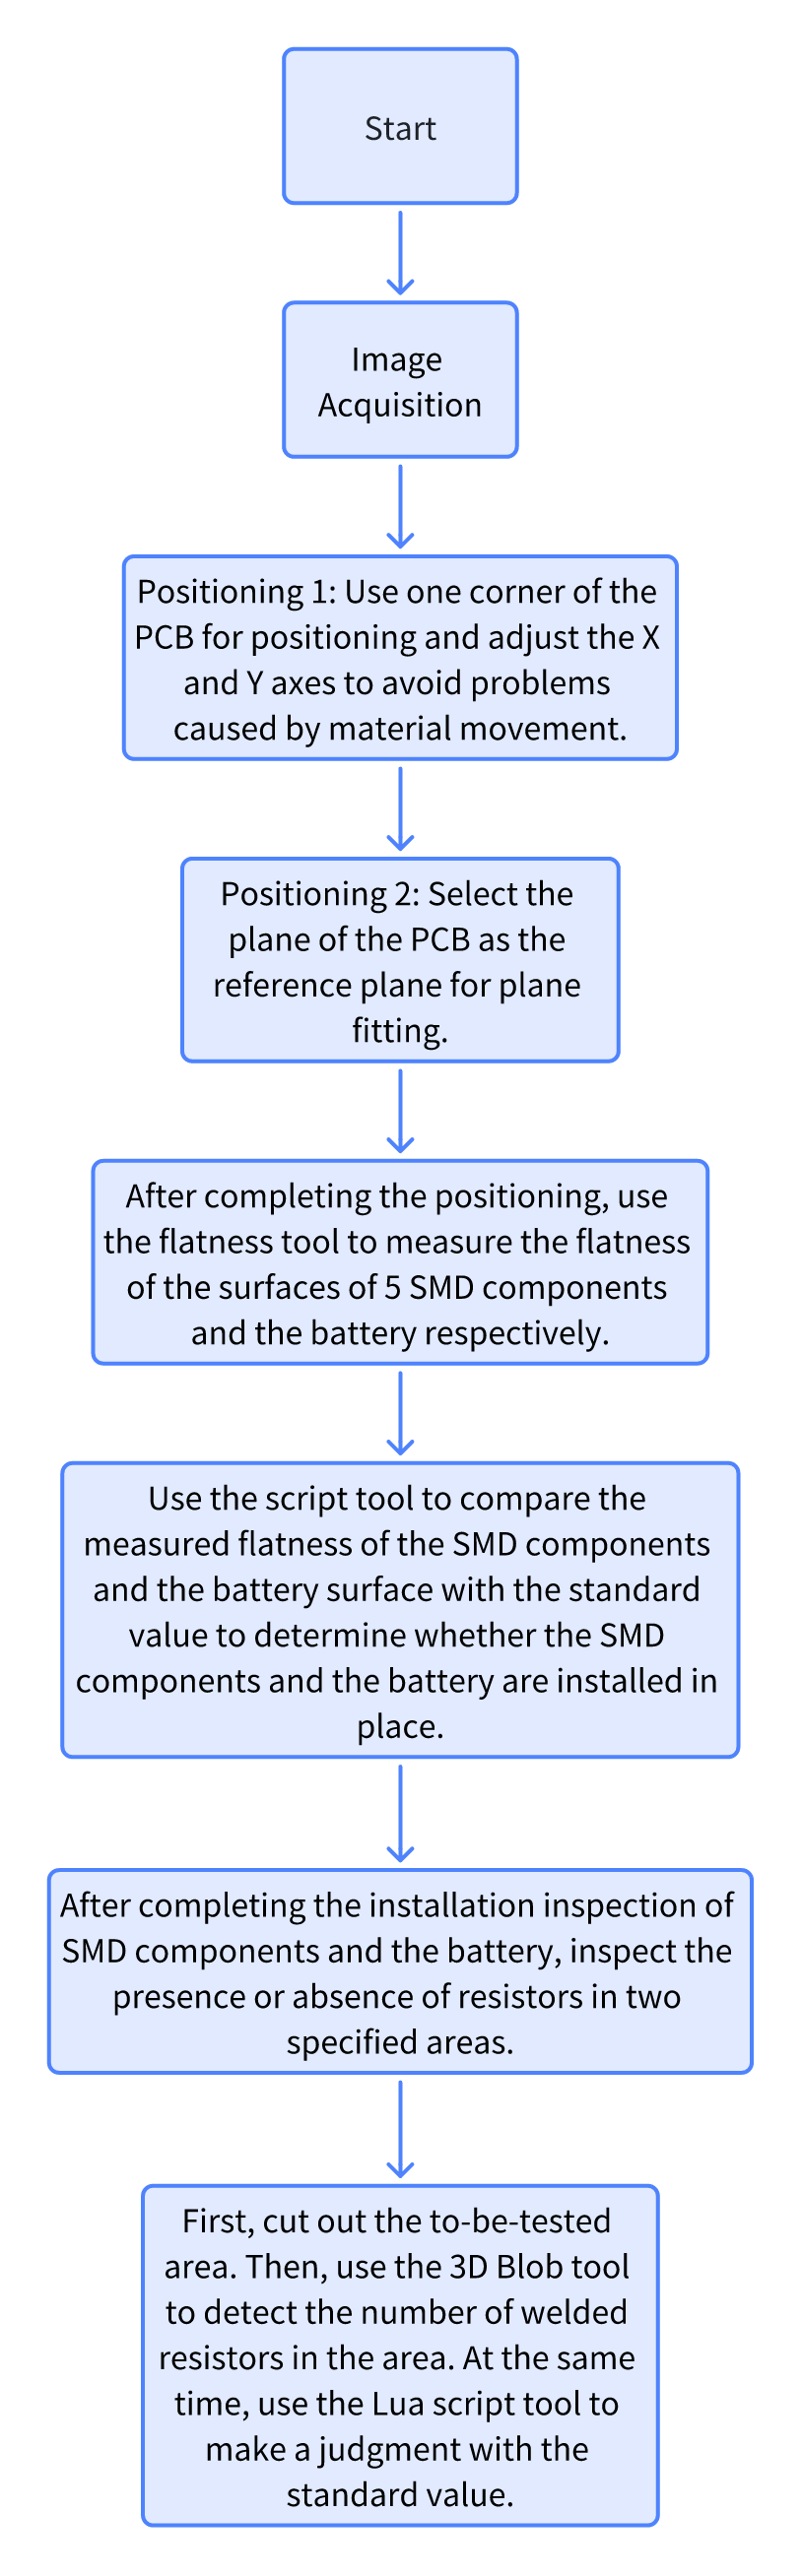
Use AI-Vision software. First, fit the reference plane and adjust it as the zero plane. Then, detect whether the chip is fully mounted through the flatness between the chip and the battery surface. Next, use the blob tool to find the number of resistors in the designated area, and judge by comparing the actual detected number with the standard number. It features fast operation speed, high precision, simple process, and modularization for easy construction.
Design Concept
Implementation Effect Display
- Project Result Display
- Height Result:
- Diameter Result:

- Height Result:
Project Process
1. Initialization
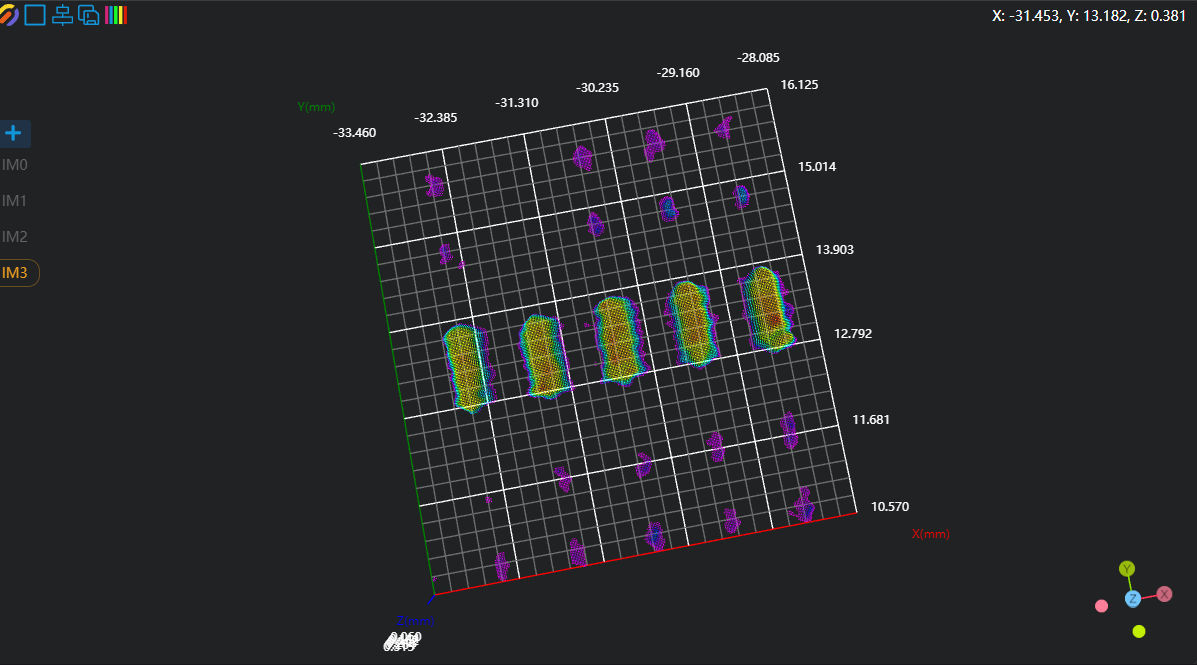
- Use the
Lua Script Toolto generate global variables "ResultPlane1" and "ResultPlane2" for saving resistor presence judgment results; generate CSV files "Plane.csv", "Resistance.csv", and "Battery.csv" for saving data. - Use the
Load Point Cloud Toolto load the point cloud.
2. Initial Positioning
Position Adjustment
- Use the
3D Square Probe Toolto obtain the left and upper edges of the workpiece.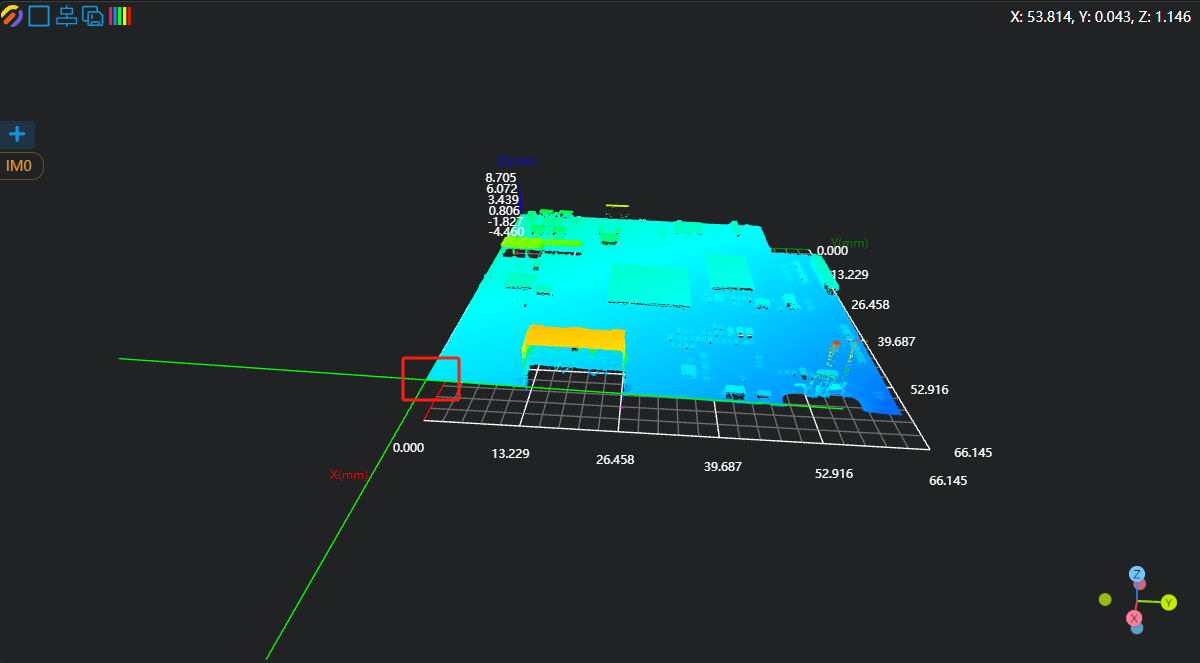
- Use the
3D Geometric Intersection Tool, bind the two edges output by the operator variables in the previous step as input geometries, and output the intersection point of the two lines. - Use the
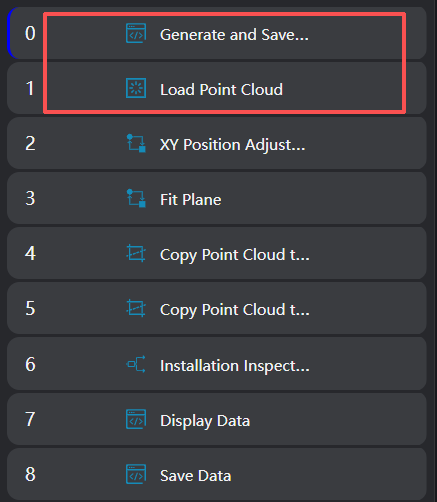
3D Position Adjustment Tool, bind the line intersection point output by the operator in the previous step as the new origin to adjust the XY position of the point cloud.
Plane Fitting
- Use the
3D Region Toolto select the region for plane fitting. - Use the
3D Plane Tool, bind the variable region output by the operator in the previous step as the input region, fit the plane, and set it as the zero plane.
Copy IM for Different Subprogram Calls
Copy the IM1 point cloud to IM2 and IM5 separately for the chip installation and resistor presence subprograms.
Note
When calling subprograms in parallel, each subprogram needs to be executed in a different IM.
3. Installation In-Place Detection
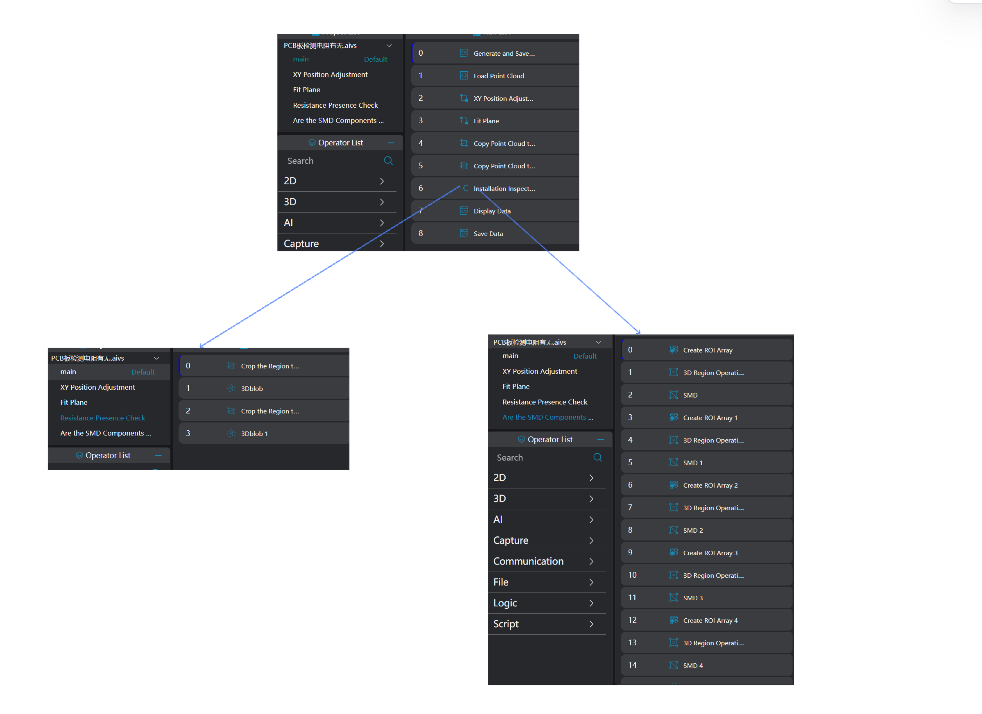
Chip and Battery Installation In-Place Check
Use the 3D Flatness Tool six consecutive times to measure the flatness of five chips and the battery respectively. (The area selected in the 3D Flatness Tool is specified by the customer's requirements; in actual project applications, it needs to be modified according to the actual situation.) 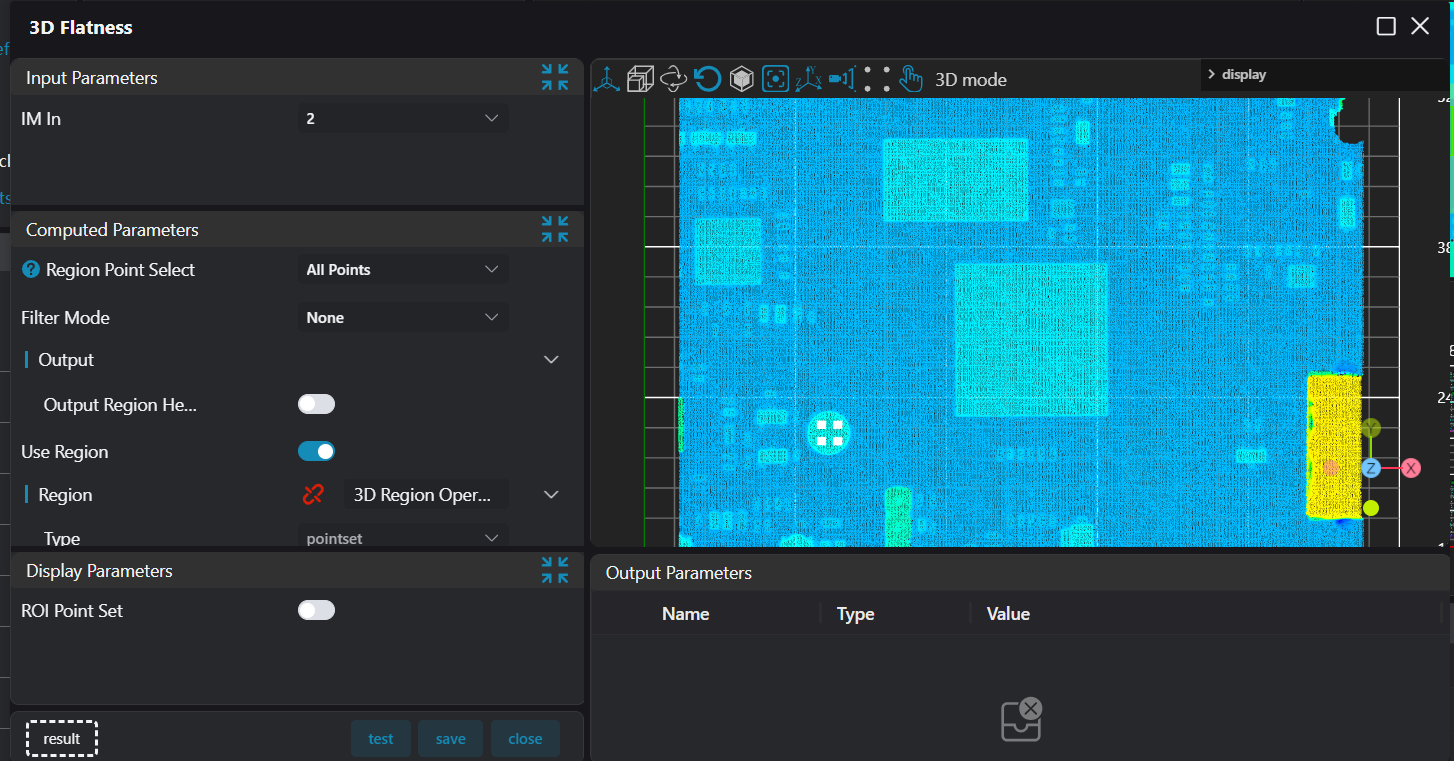
Resistor Presence in Area 1 and Area 2
- Use the
3D Cropping Toolto crop the designated area for resistor presence detection from IM5 to IM3 for subsequent measurement. - Use the
3D Blob Tool, select the entire resistor area to be measured with a box, and output the position and number of resistors based on the number of points. The steps for Area 1 and Area 2 are the same.
4. Data Judgment, Display, and Saving
Data Display
Use the Lua Script Tool
- Bind the parallel subprogram operator variables (blob information output by the
3D Blob Tool, flatness values output by the3D Flatness Tool). - Edit the script to judge whether the result is OK, and display the data on the corresponding IM.
- Save the battery and chip installation information.
- Save the resistor presence OK information of Area 1 and Area 2 to global variables.
-- Set Bool variables Judge for result judgment
Judge1 = true
Judge2 = true
Judge3 = true
Judge4 = true

-- Resistors in Area 1
count = #blob1
if count ~= 5 then
    Judge1 = false
end

SetBoolVariable("ResultPlane1",Judge1)

x = blob1[1].X
y = blob1[1].Y
z = blob1[1].Z

-- Display the result on IM after judgment
if Judge1 == true then
    DrawText3D(2,"green",x,y,3,48,"No Missing Resistor Soldering")
else
    DrawText3D(2,"red",x,y,3,48,"Missing Resistor Soldering")
end

-- Resistors in Area 2
count = #blob2
if count ~= 11 then
    Judge2 = false
end

SetBoolVariable("ResultPlane2",Judge2)

x = blob2[1].X
y = blob2[1].Y
z = blob2[1].Z

-- Display the result on IM after judgment
if Judge2 == true then
    DrawText3D(2,"green",x,y,3,48,"No Missing Resistor Soldering")
else
    DrawText3D(2,"red",x,y,3,48,"Missing Resistor Soldering")
end

-- Chip installation
-- Store variables in an array
local flatnessArray = {flatness1, flatness2, flatness3, flatness4, flatness5}

write = ""

-- Loop judgment
for i = 1 , 5 , 1 do
    Result = flatnessArray[i]
    if Result > 0.05 then
        write = write .. string.format("%.3f,",Result) .. "NG" .. ","
        -- Modify the value of Judge to false when the result does not meet the requirements
        Judge3 = false
    else
        write = write .. string.format("%.3f,",Result) .. "OK" .. ","
    end
end

-- Display the result on IM after judgment
if Judge3 == true then
    write = write .. "OK" .. "\n"
    DrawText3D(2,"green",-33,30,3,48,"Chips Fully Mounted")
else
    write = write .. "NG" .. "\n"
    DrawText3D(2,"red",-33,30,3,48,"Chips Not Fully Mounted")
end

-- Save the result to the CSV file
PrintToFile("./Plane.csv",write)

-- Battery installation
write = ""

-- Read the measured battery flatness value
Result = flatness

if Result > 0.05 then
    write = write .. string.format("%.3f,",Result) .. "NG" .. "\n"
    Judge4 = false
    -- Display the result on IM after judgment
    DrawText3D(2,"red",-50,20,3,48,"Battery Not Fully Mounted")
else
    write = write .. string.format("%.3f,",Result) .. "OK" .. "\n"
    DrawText3D(2,"green",-50,20,3,48,"Battery Fully Mounted")
end

-- Save the result to the CSV file
PrintToFile("./Battery.csv",write)Resistor Presence File Saving
- Bind the global variables of resistor information output by the
Lua Script Toolin the previous step. - The Lua script judges and saves the information to the CSV file.
write = ""

if ResultPlane1 == true then
    if ResultPlane2 == true then
        write = write .. "OK" .. "," .."OK" .."\n"
    else
        write = write .. "OK" .. "," .."NG" .."\n"
    end
elseif ResultPlane1 == false then
    if ResultPlane2 == true then
        write = write .. "NG" .. "," .."OK" .."\n"
    else
        write = write .. "NG" .. "," .."NG" .."\n"
    end
end

PrintToFile("./Resistance.csv",write)