3D Circle
Operator Function
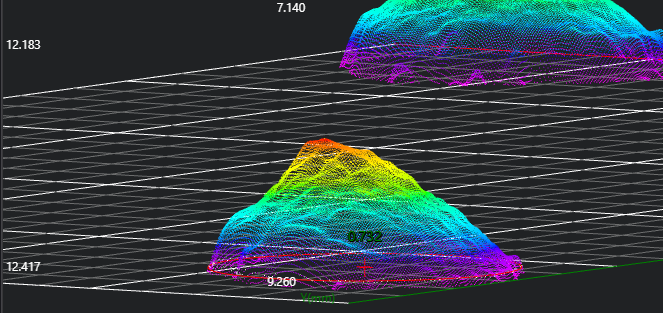
Find edge points in the ROI; fit a 3D circle based on the found edge points.
Parameter Introduction
Input Parameters

| Parameter | Range | Default Value | Description | Illustration |
|---|---|---|---|---|
| Input Image | 0-8 | 0 | IM number for image input | |
Calculation Parameters
| Parameter | Range | Default Value | Description | Illustration |
|---|---|---|---|---|
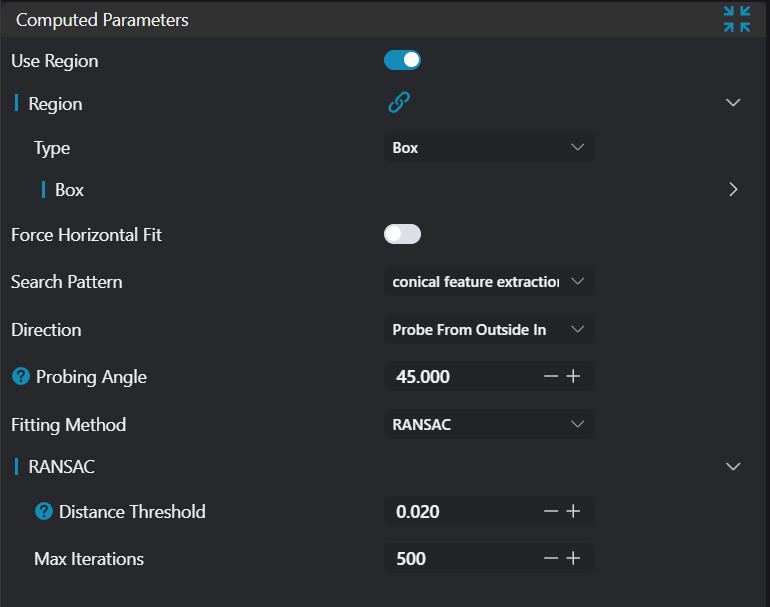
| Use Region Parameters | true/false | false | If enabled, use region as input; if disabled, use input image as input | |
| Region | 2D Window/Box | Box | Manually select appropriate ROI region > Note: Ensure the ROI center point is inside the circle. Can bind to select existing ROI region. When input is an array, output is also an array | |
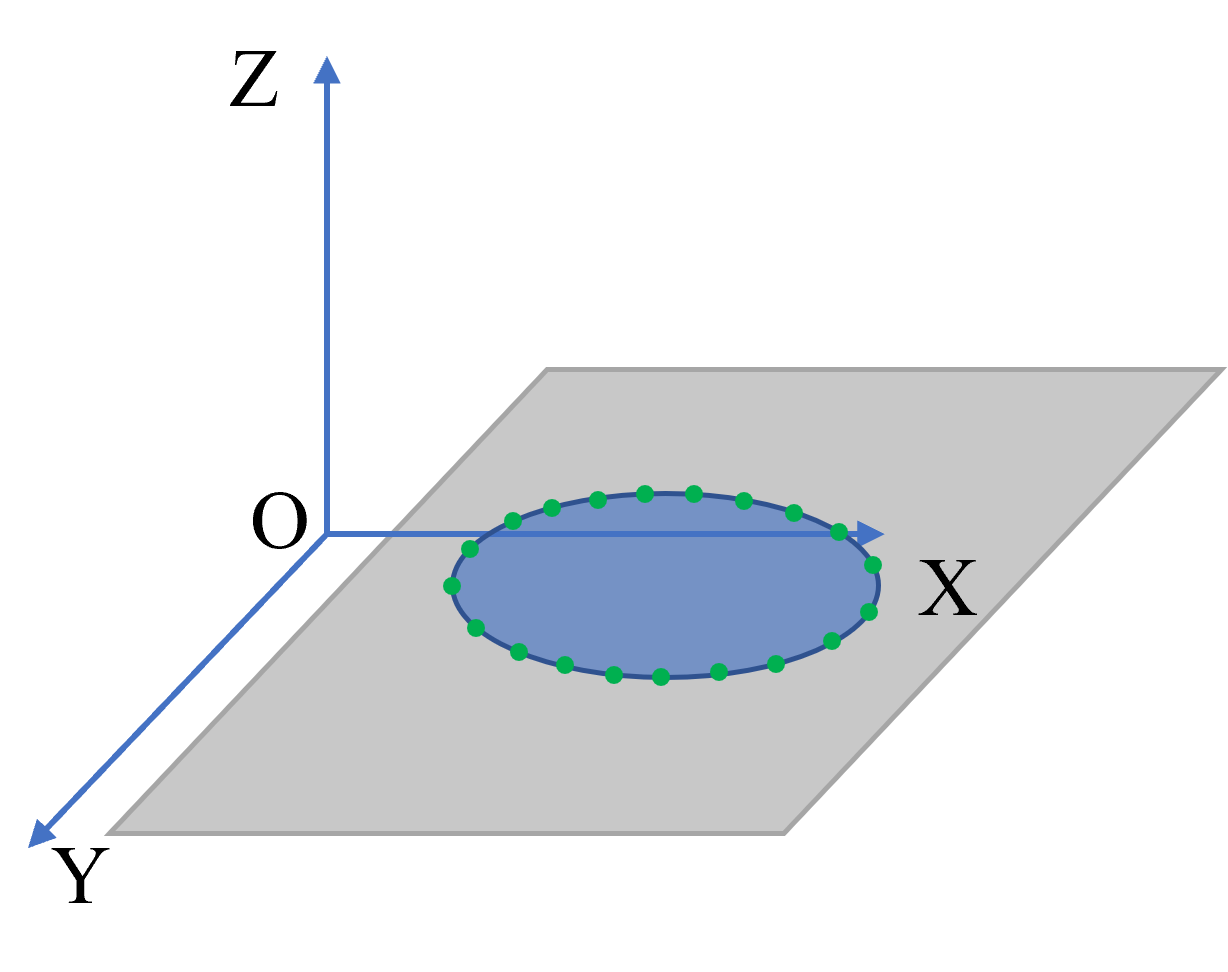
| Force Horizontal Fit | true/false | false | Force horizontal fit means requiring the model's normal vector or main direction to be parallel to the horizontal plane when fitting planes or other geometric shapes, typically used to ensure the model is horizontal in certain application scenarios. When enabled, it will force correction from the red circle to the blue circle |  |
| Search Mode | Conical Point Search | Conical Point Search | Conical Point Search: Use the conical probe method to find edge points, controlling the probe angle to locate edge points in the point cloud | 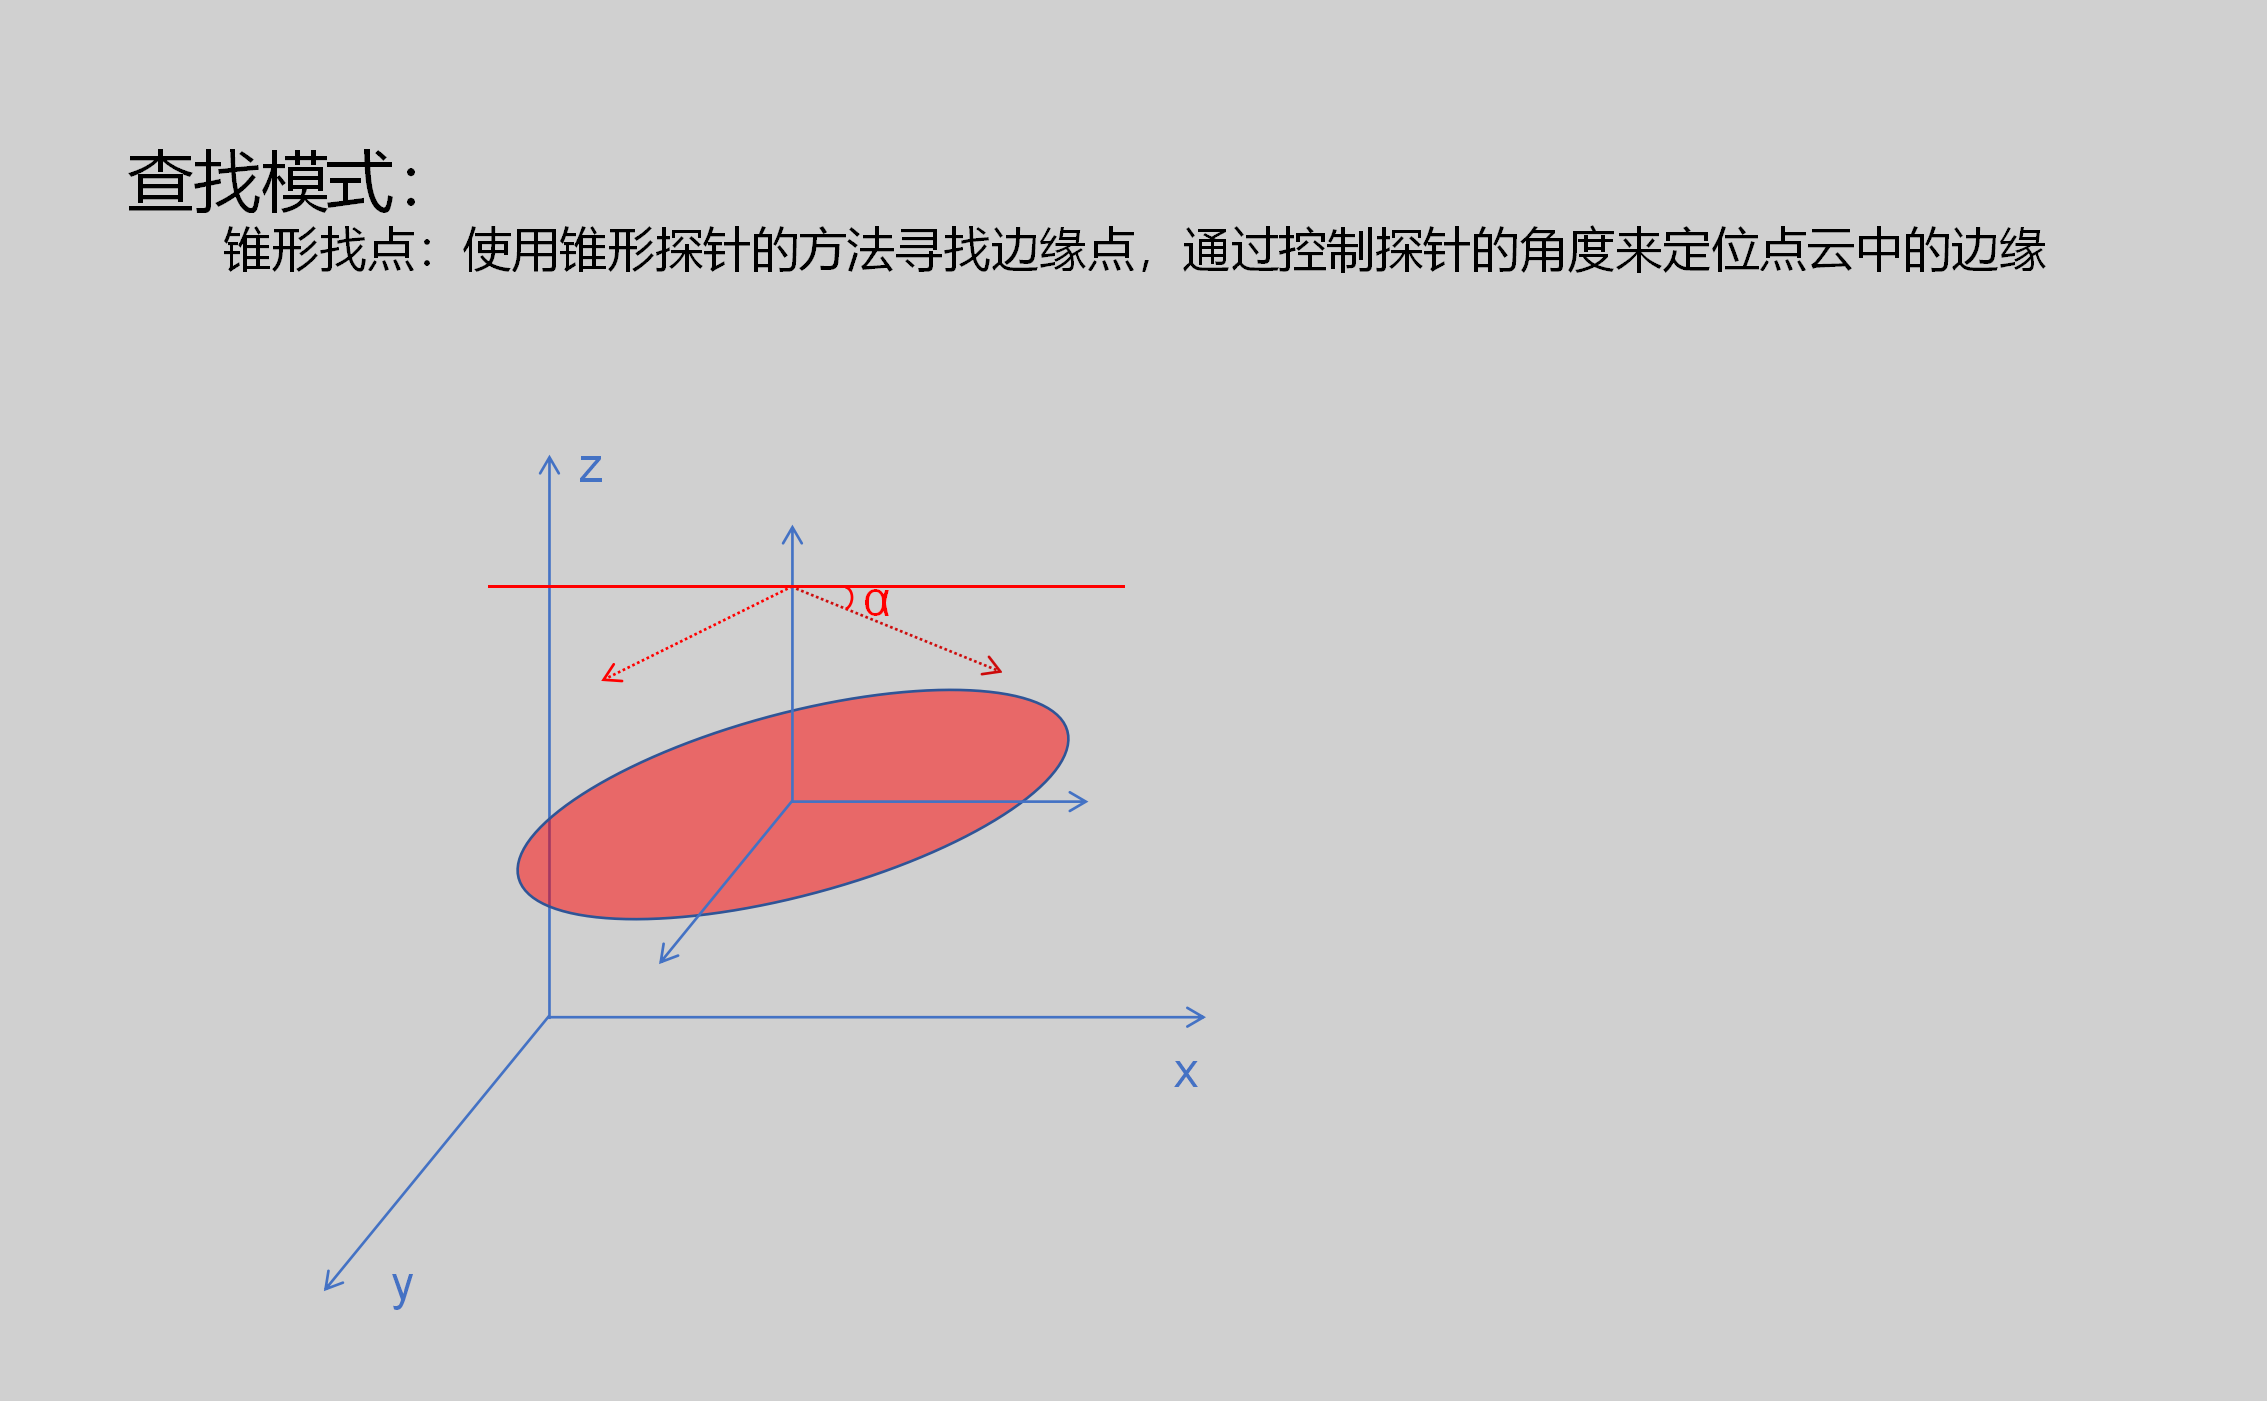 |
| Probe Angle | 45 | Controlling the probe angle can affect the definition of edge points. Typically choose an appropriate angle range to ensure real edge points can be detected | ||
| Fitting Method | Ransac/Least Squares | Ransac | Ransac: Used to fit models from data, especially when there is noise or outliers in the data Least Squares: Fit models by minimizing the sum of squared errors, suitable for situations with small errors, concentrated data points, uniform edge point distribution, and little noise | |
| Distance Threshold | 0.02 | Used to define the maximum distance between a point and the fitted model. Points beyond this distance are considered outliers and do not participate in fitting | 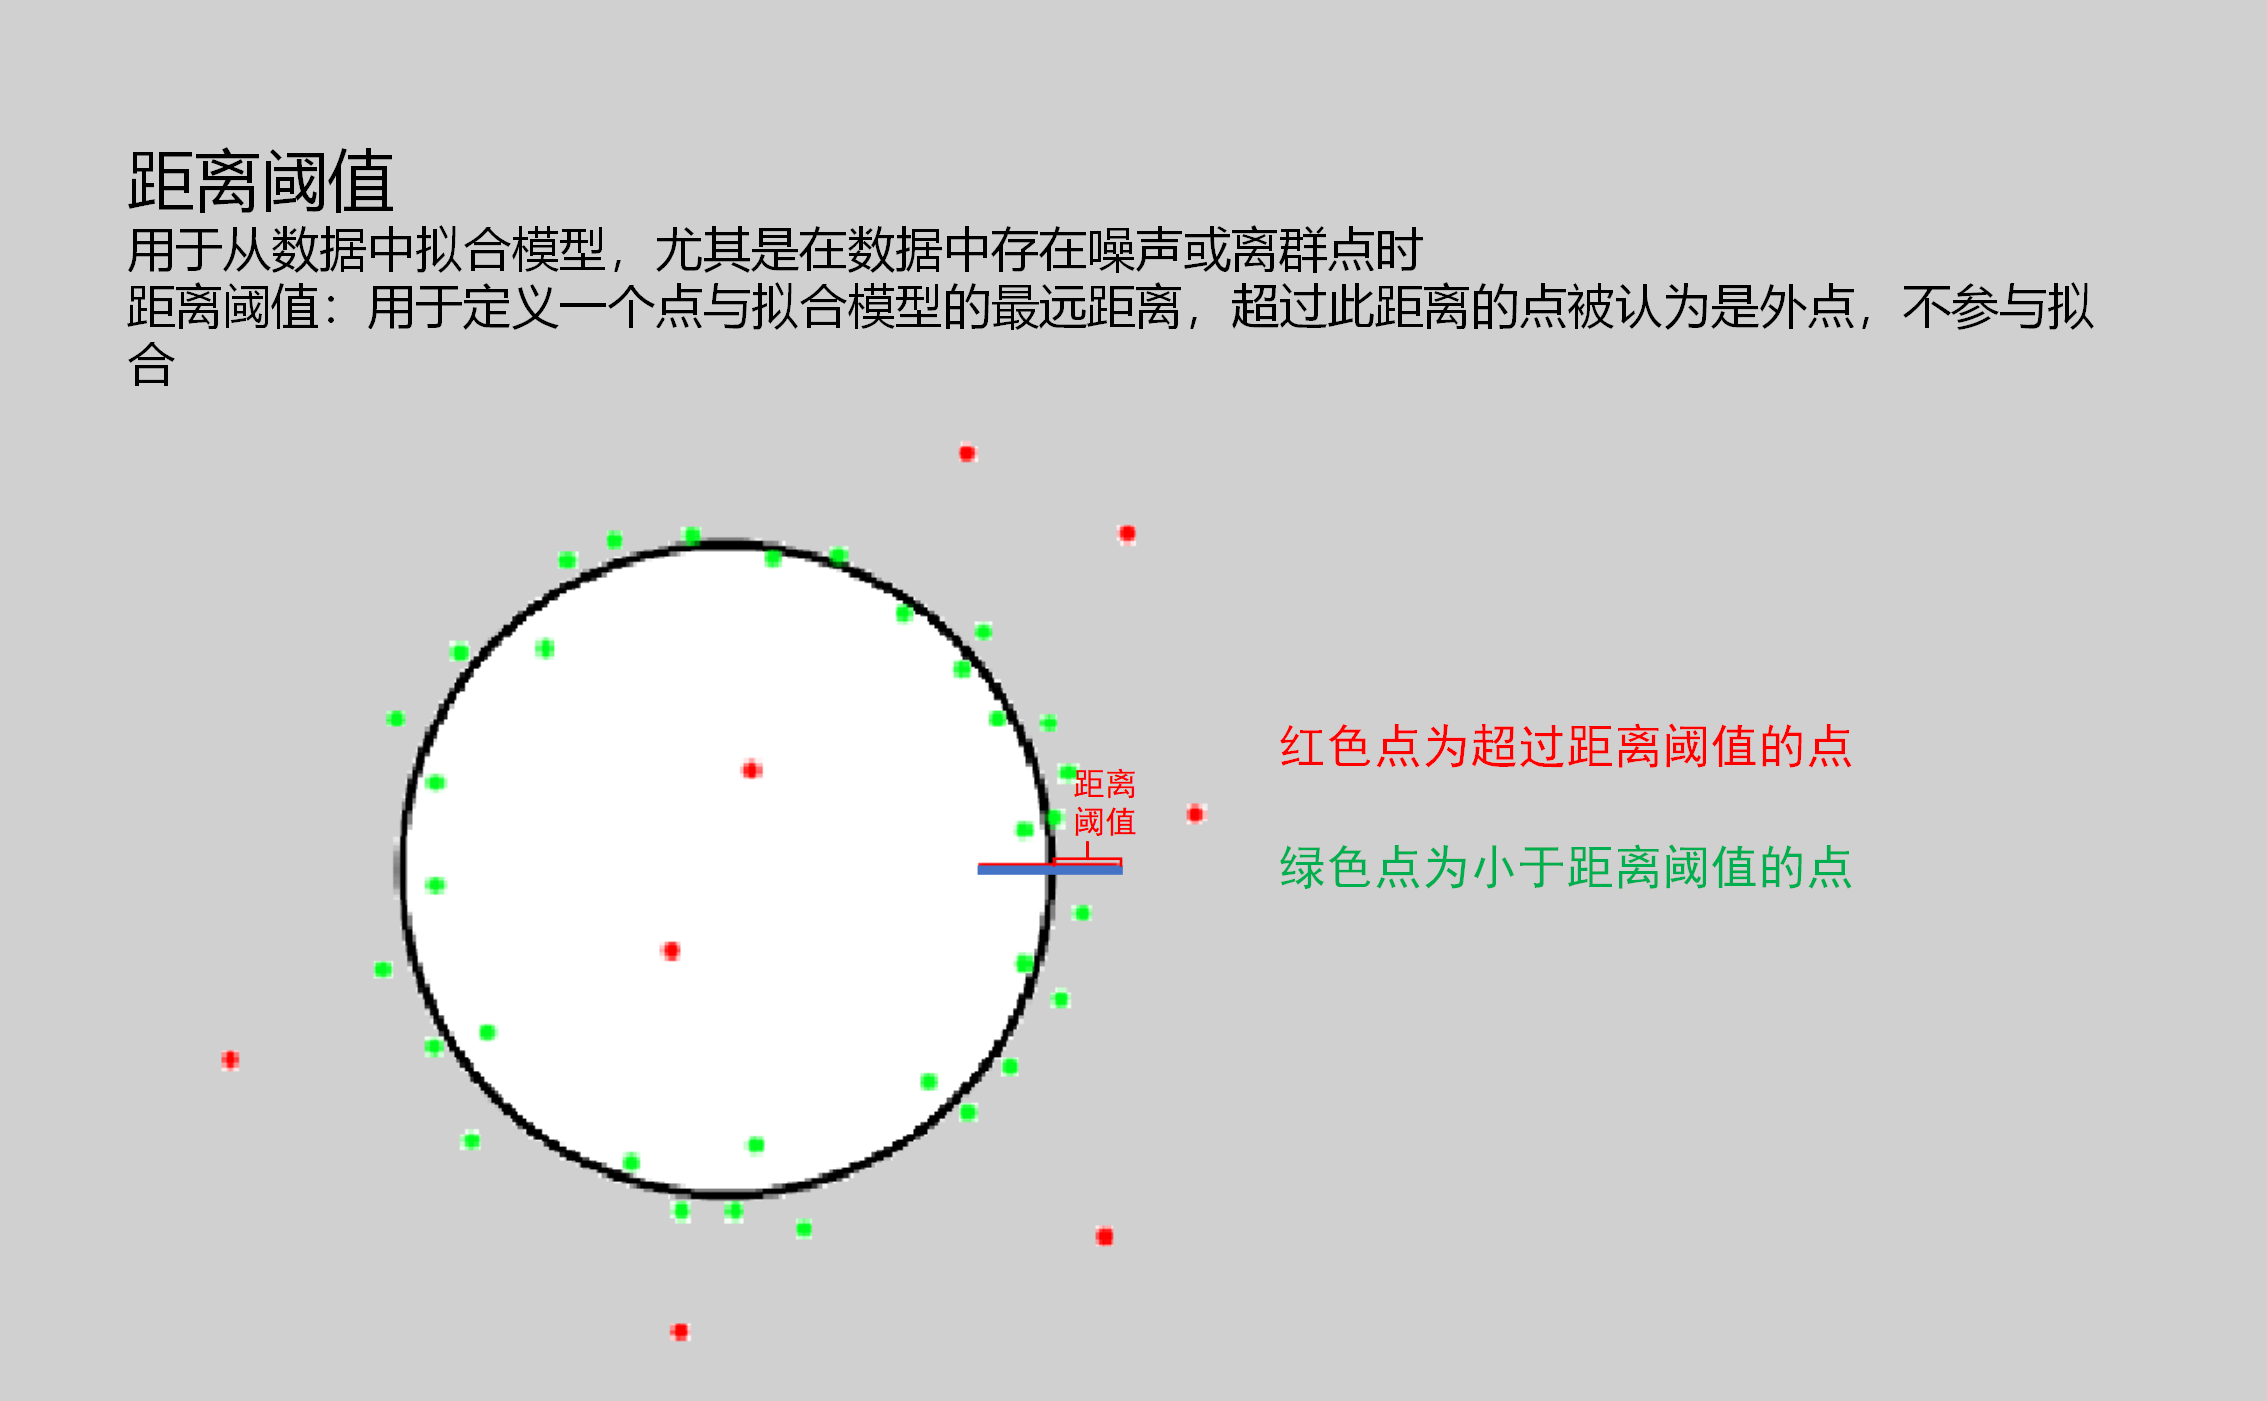 | |
| Maximum Iterations | 500 | Used to set the maximum number of iterations for the RANSAC algorithm. Generally, more iterations result in more accurate fitting results, but computational cost also increases |
Tip
For more detailed explanations of parameter types, please refer to Type Definitions
Result Display
| Parameter | Range | Default Value | Description | Illustration |
|---|---|---|---|---|
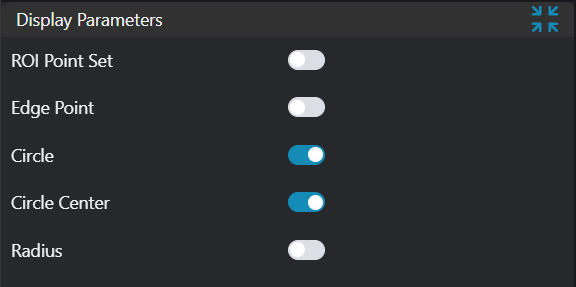
| ROI Point Set | true/false | false | Only effective when Use Region Parameters is selected. Region point set selected by ROI box. If enabled, display in the image | |
| Edge Points | true/false | false | Edge points. If enabled, display in the image | |
| Circle | true/false | false | Fitted circle. If enabled, display in the image | |
| Circle Center | true/false | false | Circle center. If enabled, display in the image | |
| Radius | true/false | false | Radius. If enabled, display in the image |
Output Parameters
| Name | Type | Range | Description |
|---|---|---|---|
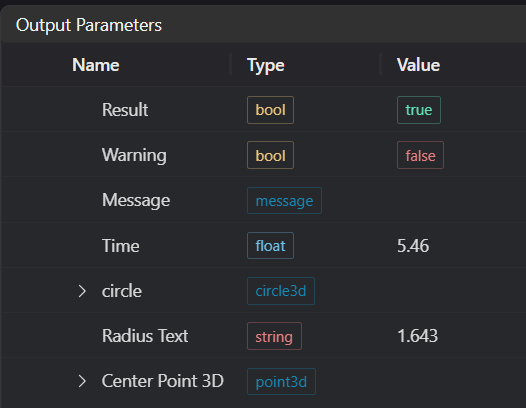
| Result | bool | true/false | true for success false for failure |
| Warning | bool | true/false | true indicates a warning false indicates no warning |
| Message | string | Output success, error, or warning messages. Empty if no error or warning. | |
| Time | float | Operator execution time, unit: ms | |
| edge_cloud_point | pointset | 3D circle feature points When input is an array, output is also an array | |
| circle | circle3d | Found 3D circle coordinates and direction When input is an array, output is also an array | |
| Rradius Text | string | Radius value | |
| Center Point 3D | point3d | Found 3D circle center point |
Exception Troubleshooting
| No. | Exception Information | Corresponding Parameter | Solution |
|---|---|---|---|
| 1 | Input value is {0t}, invalid region type | Region Type | Only window2d, box, pointset supported |
| 2 | Region point cloud is empty | 1. Check if point cloud is empty 2. Check if ROI selects point cloud 3. Check if binding is empty | |
| 3 | No plane found | Robustness content, rarely occurs | |
| 4 | Not found | Adjust fitting parameters |
Example Introduction
Engineering Design
Select the
Load Point Cloudtool to load the required 3D point cloud image to IM0.Select the
3D Circletool.
Tool Usage
Select the input image for the operation. The image number must match the IM number where the image is located in the project.
Select the region type as Box, move the box to the position to be measured, enclosing the point cloud area to be tested.
Usage Tips
- Use the ROI controller on the image window to drag or scale the box;
- Directly modify the box's start or end point coordinates in the calculation parameters to adjust the box position and size;
Set the parameters.
Check the content you want to display in the result display section.
Click
Testto check if the image window and parameters meet expectations.If there are no issues, click
Save. Run the operator in the run list, and then view the running results in the corresponding IM.