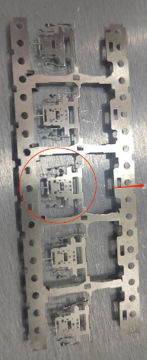
Measurement of Type-C Connector Pin Step Difference
Project Introduction
Project Background
By accurately measuring the pin step difference, defective products can be detected and eliminated in a timely manner, reducing the defective rate.
Camera Selection
LMI laser line scan camera Gocator2510
Detection Requirements
- Measurement accuracy ≤ 0.02mm
- Measurement repeatability ≤ 0.015mm
- Measurement cycle ≤ 200ms
Solution
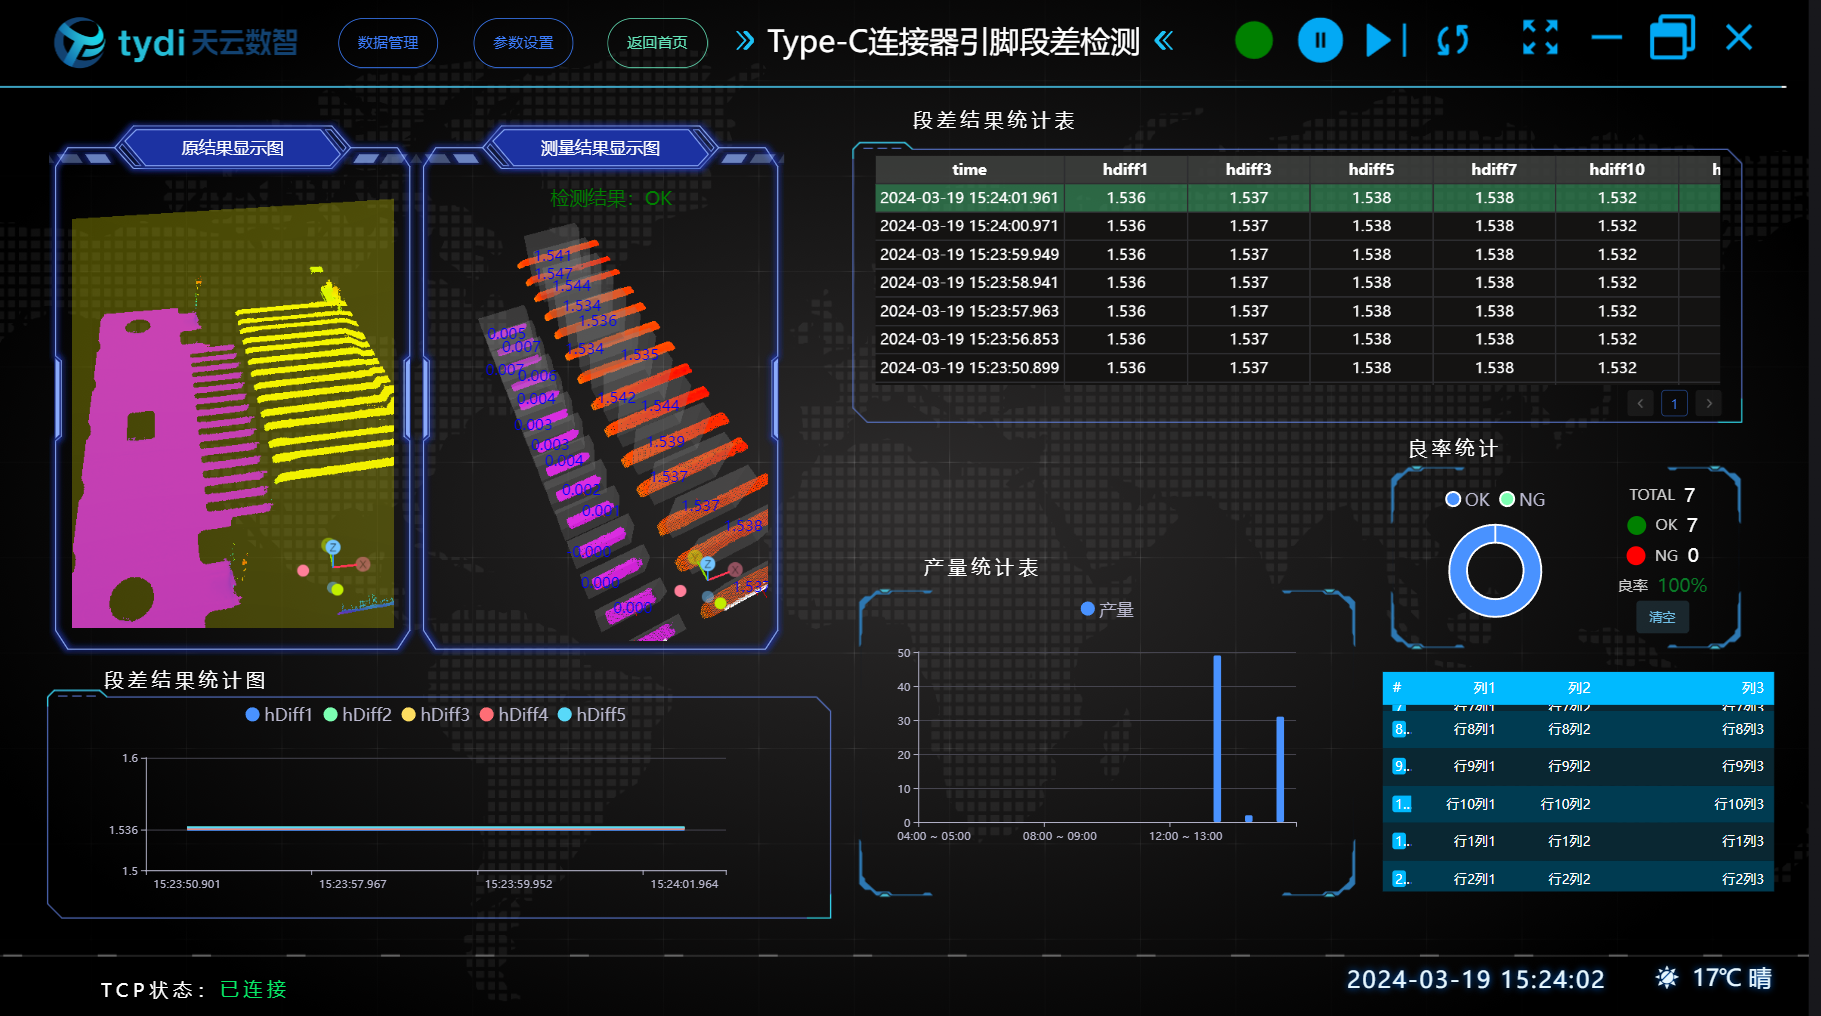
AI-Vision software processes 3D point clouds. After product positioning, a reference plane is fitted. The step difference is measured by cyclically measuring the heights of the upper and lower ends and then taking the difference. Compared with the method of converting to 2D, this project greatly simplifies the process and improves both processing speed and accuracy.
Design Idea
Execution Effect Display
Project Result Display:
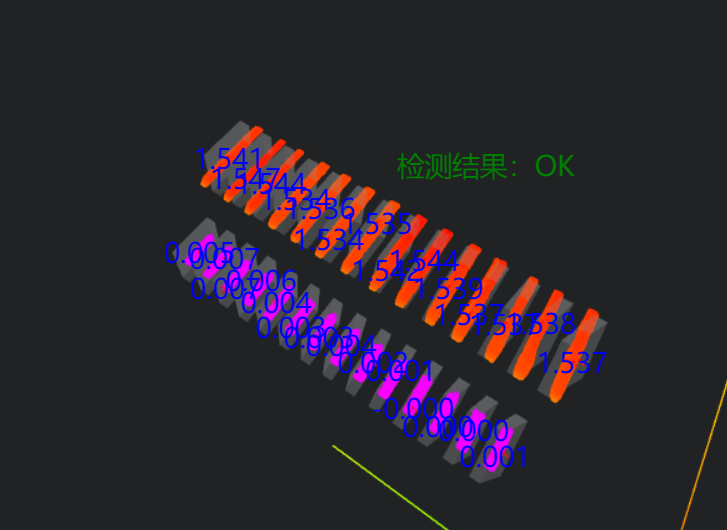
HMI Result Display:
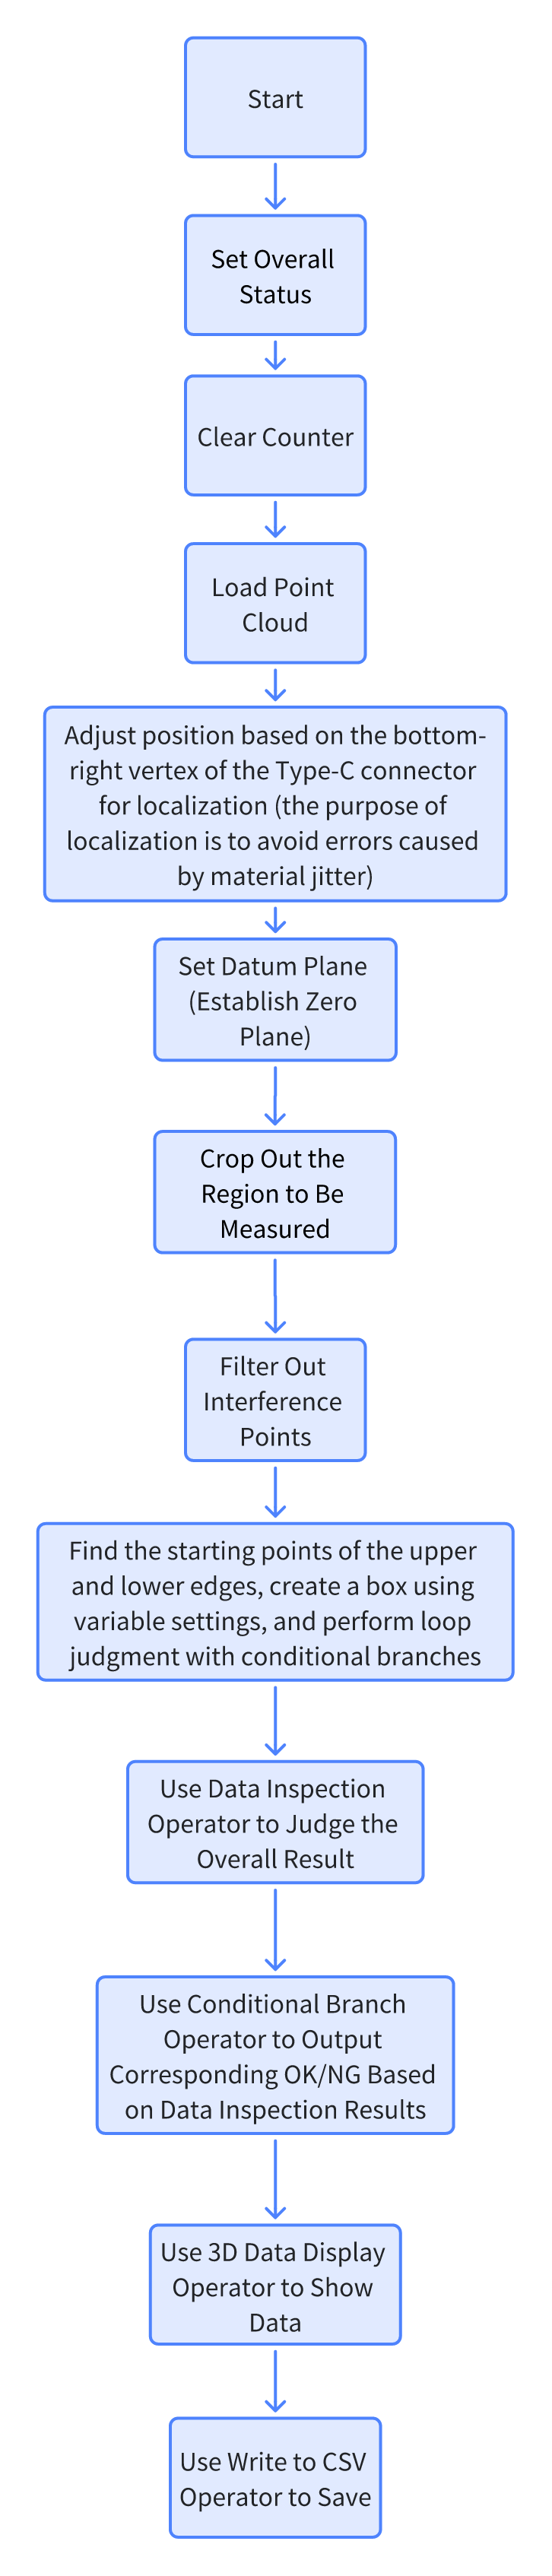
Project Process
1. Initialization
- Set the initial box coordinates and overall result parameters
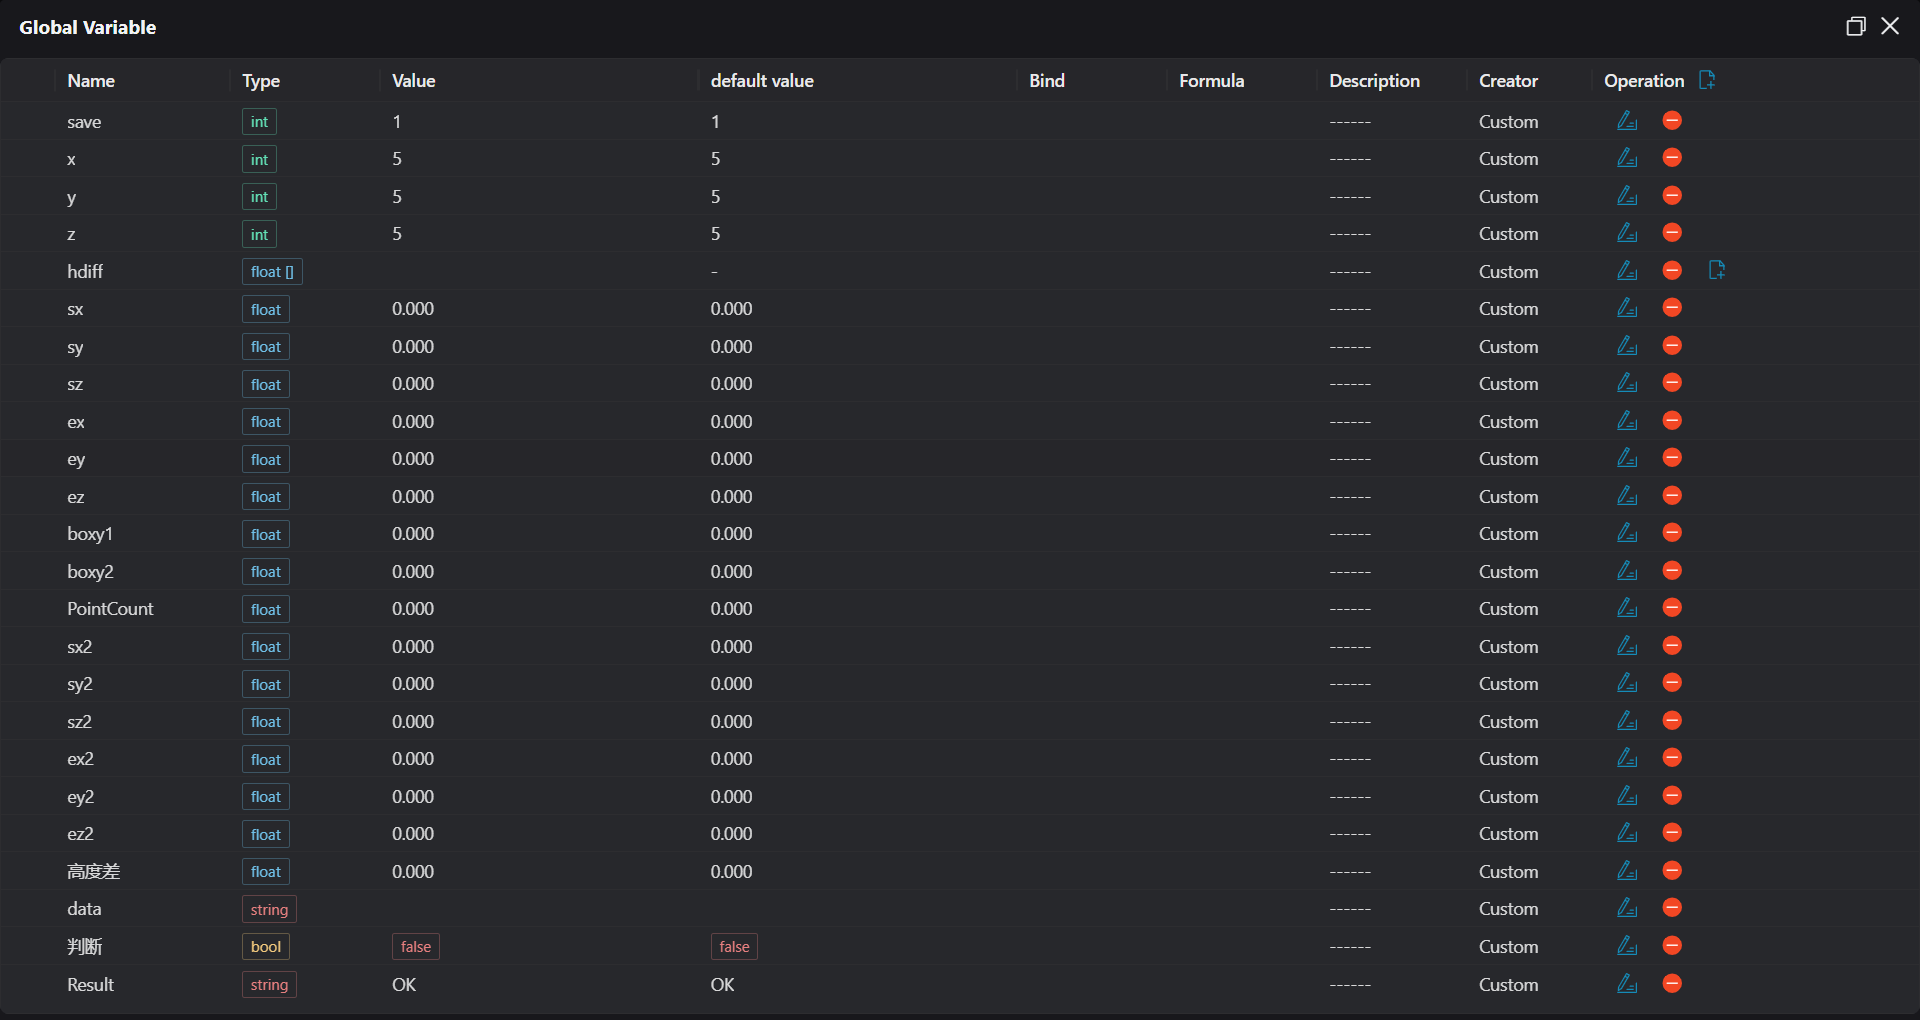
Initialize the count
Use the
Load Point Cloudtool to load the point cloud image to be processed.
2. Preprocessing
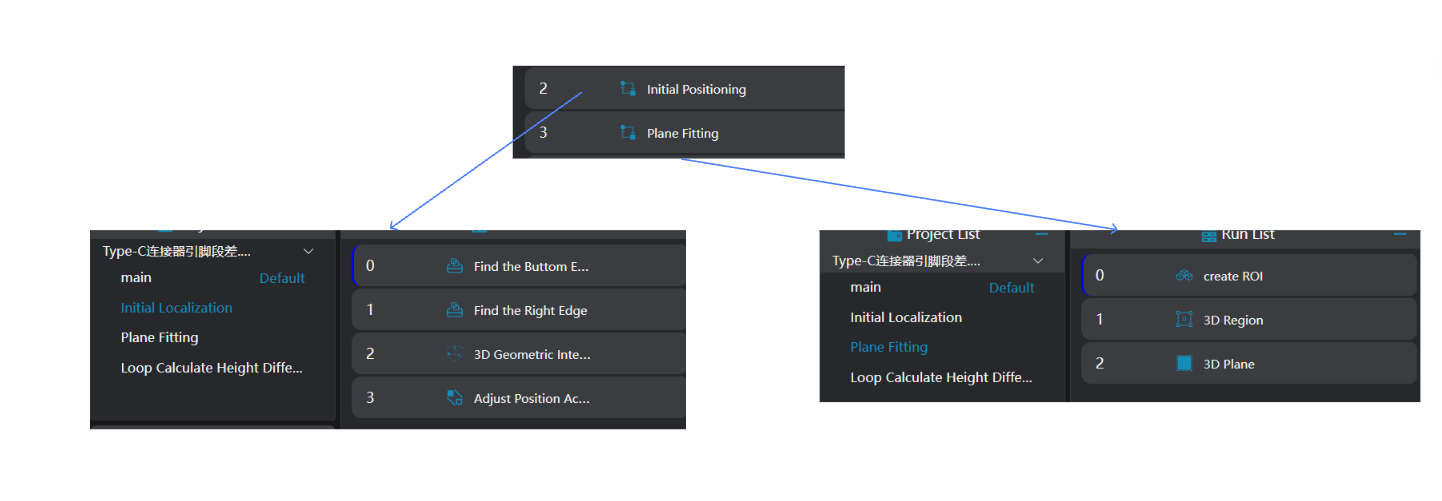
Position Adjustment
Use the
3D Square Probetool to obtain two edges of the workpiece.
Use the
3D Geometric Intersectiontool, bind the two edges output by the operator variables in the previous step as input geometries, and output the intersection point of the two straight lines.Use the
3D Position Adjustmenttool, bind the straight line intersection point output by the operator in the previous step as the new origin to adjust the XY position of the point cloud.
Plane Fitting
Use the
3D Regiontool to select the region for plane fitting.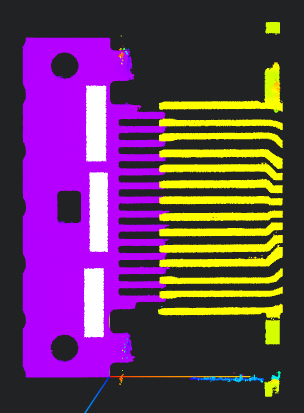
Use the
3D Planetool, bind the variable region output by the operator in the previous step as the input region, fit the plane and set it as the zero plane.
Crop the Region to be Tested
Select the 3D Crop tool to crop the part to be measured into IM1.

Image Preprocessing
Select the 3D Outlier Filter tool to filter the point cloud in IM1 and remove interference points.

3. Cyclic Calculation of Pin Step Difference
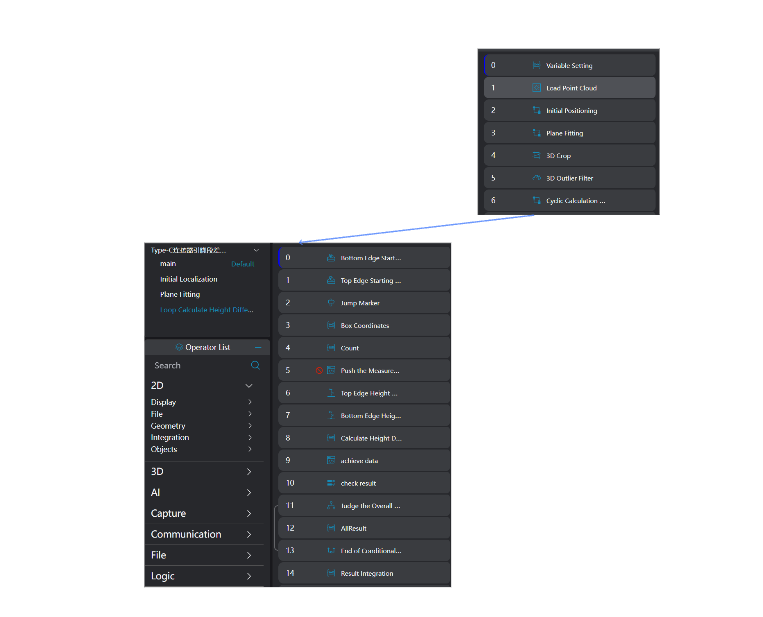
Select the
3D Square Probetool to find the starting points of the upper and lower parts respectively.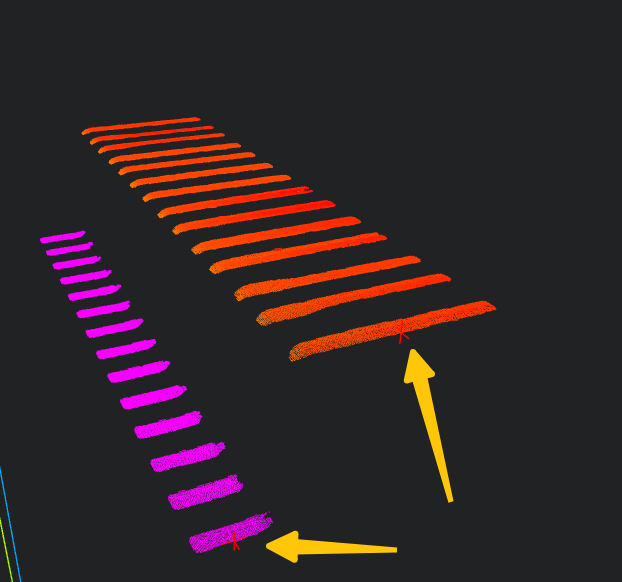
Use the
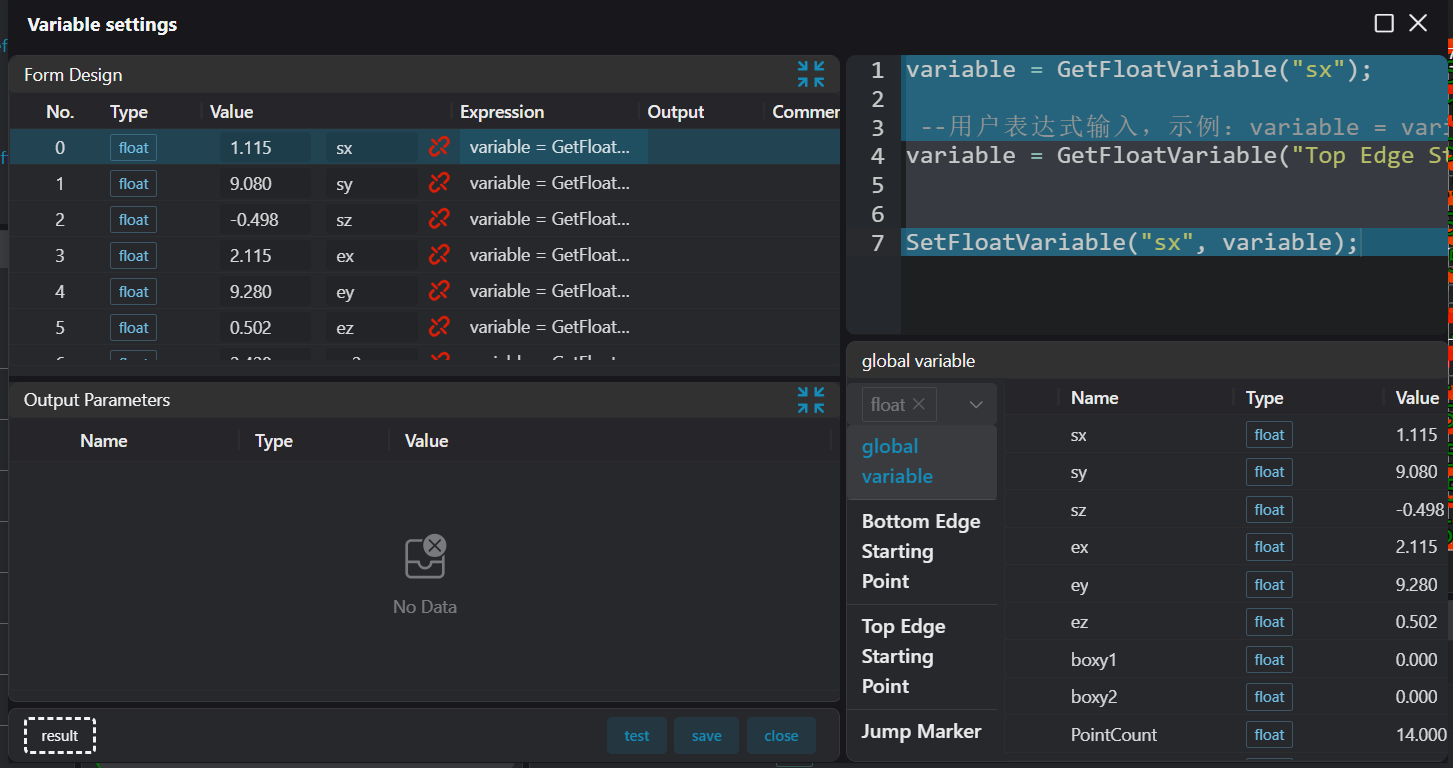
Markertool to setstartLoopfor loop jump.Select the
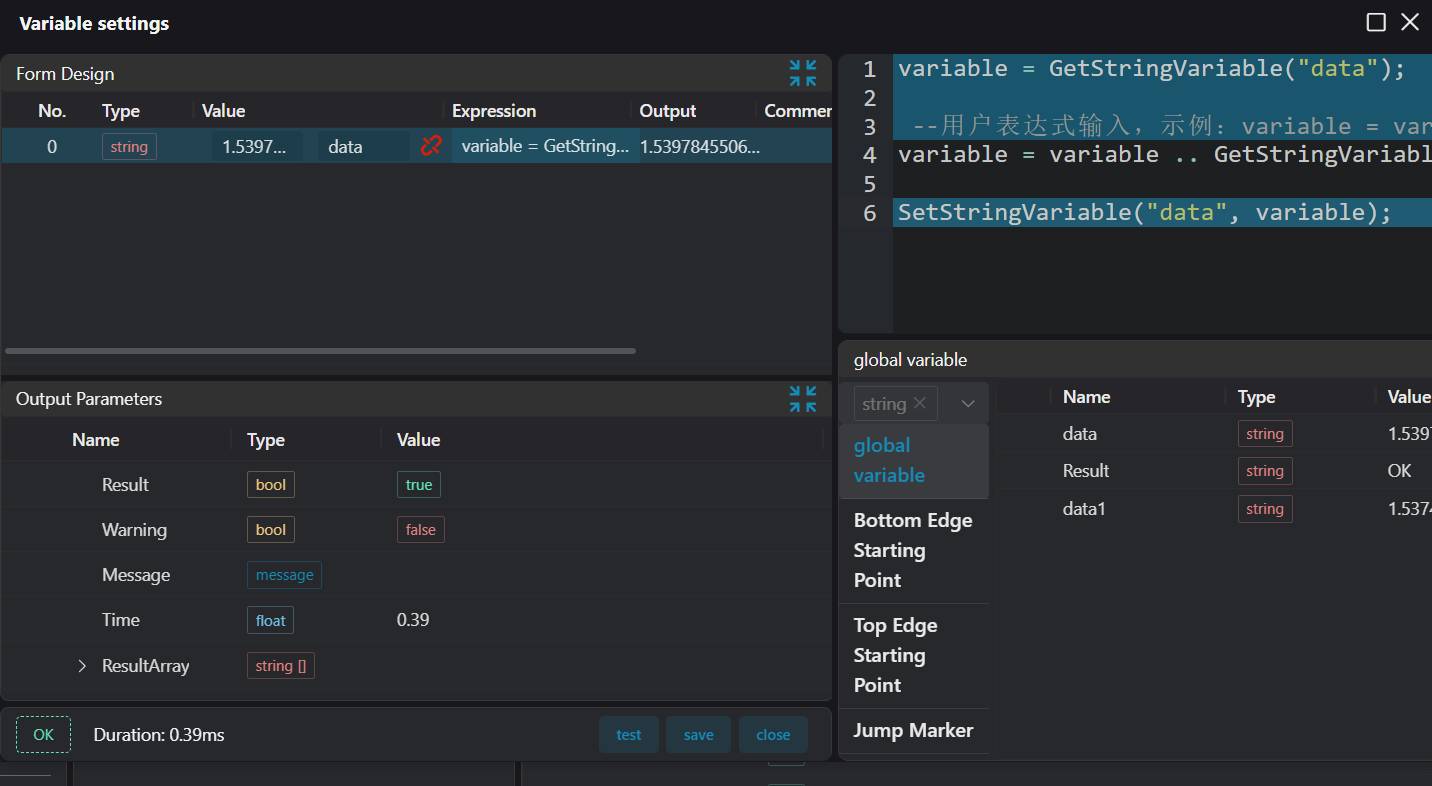
Variable Settingtool
Bind the midpoint of the output variable of the
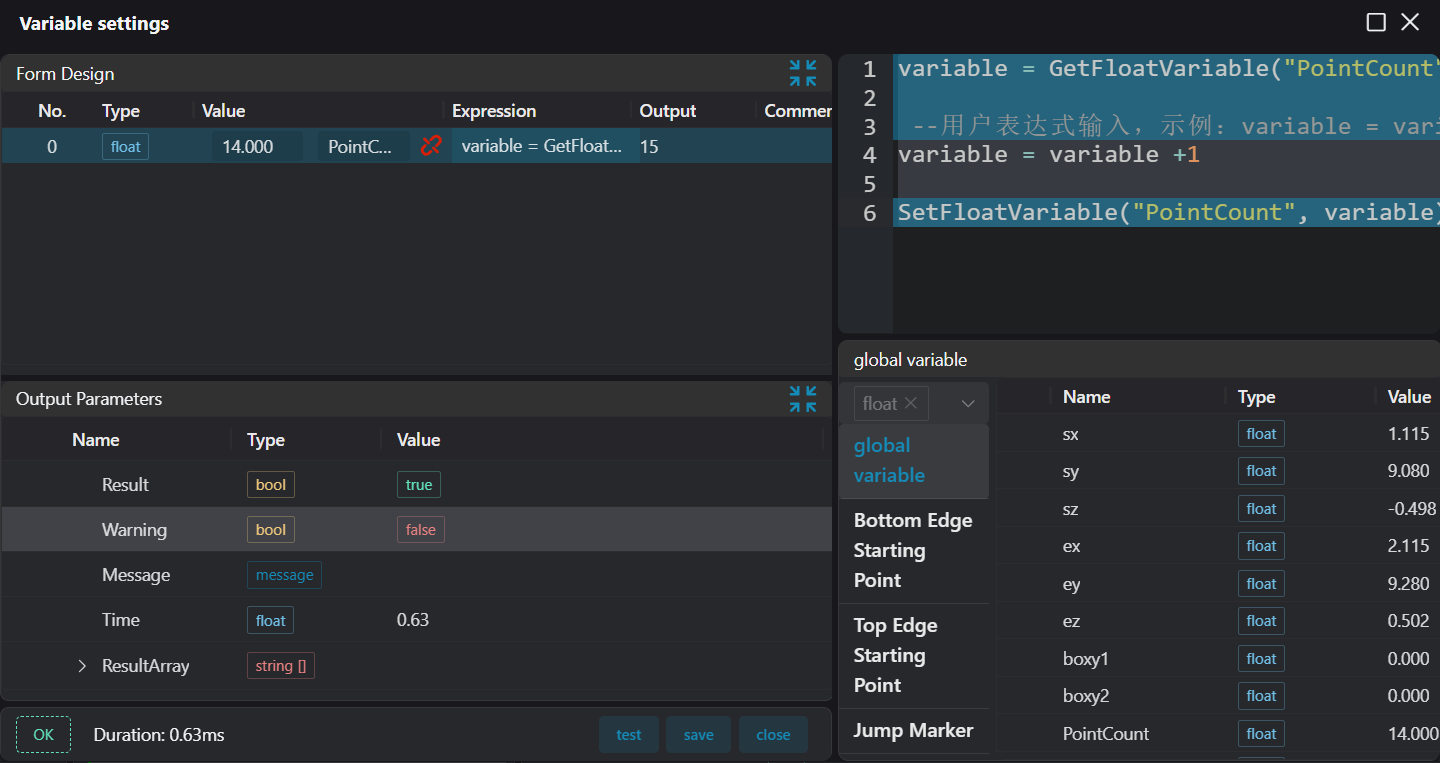
3D Square Probetool as the starting point for measuring the upper and lower edges.Calculate the position of the next point to be measured, and output the measurement box of the point to be measured to the operator output variable.
Increase the loop count by 1.
Select the
3D Heighttool, bind the operator output variable (current measurement box of the point to be measured) of theVariable Settingtool, and measure the height value.Select the
Variable Settingtool to calculate the height difference

- Use the
Variable Settingtool to save the pin height data to the array global variable, and splice the pin height data into a string
- And judge whether to loop.
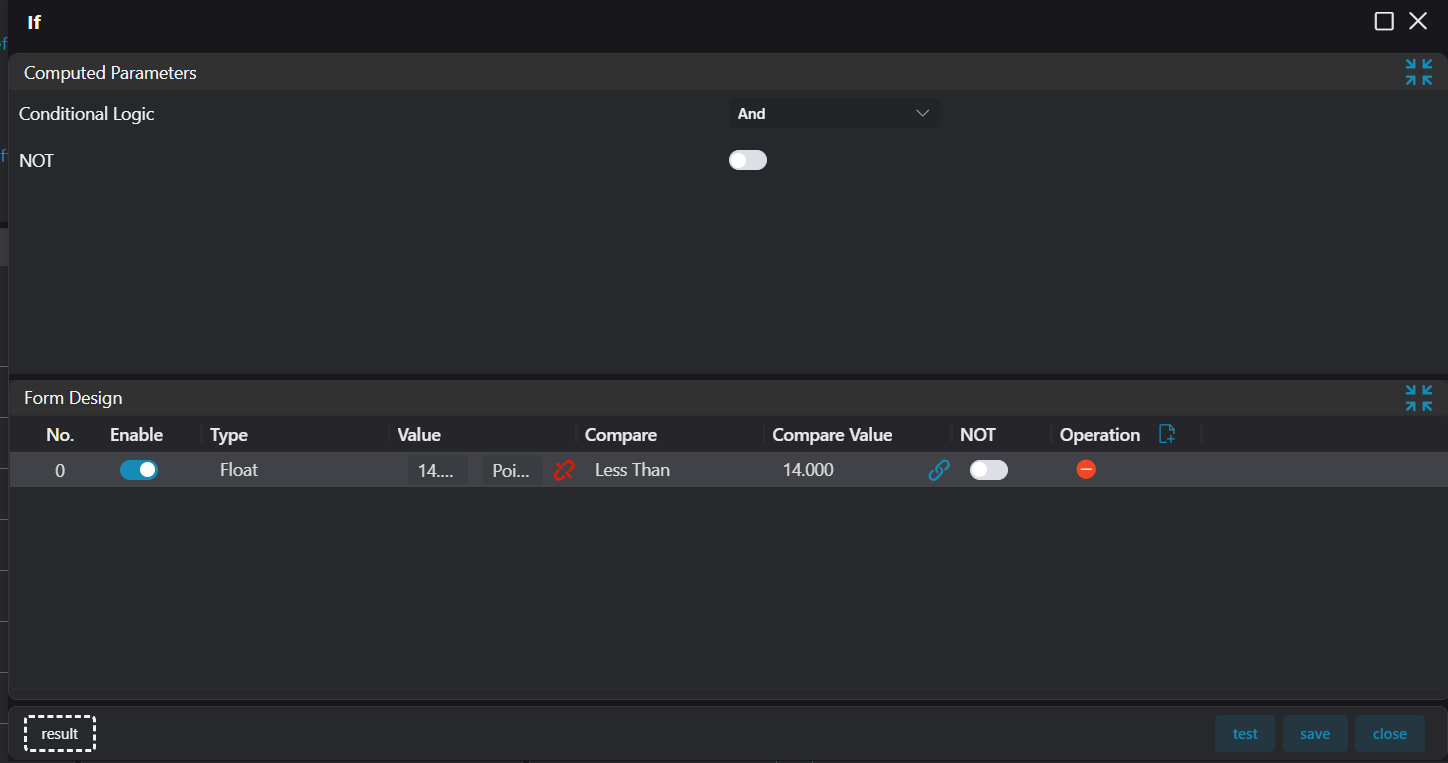
- Judge whether there is NG data, if so, the whole is NG.
- Use the
Markertool to setstopLoopfor end jump.
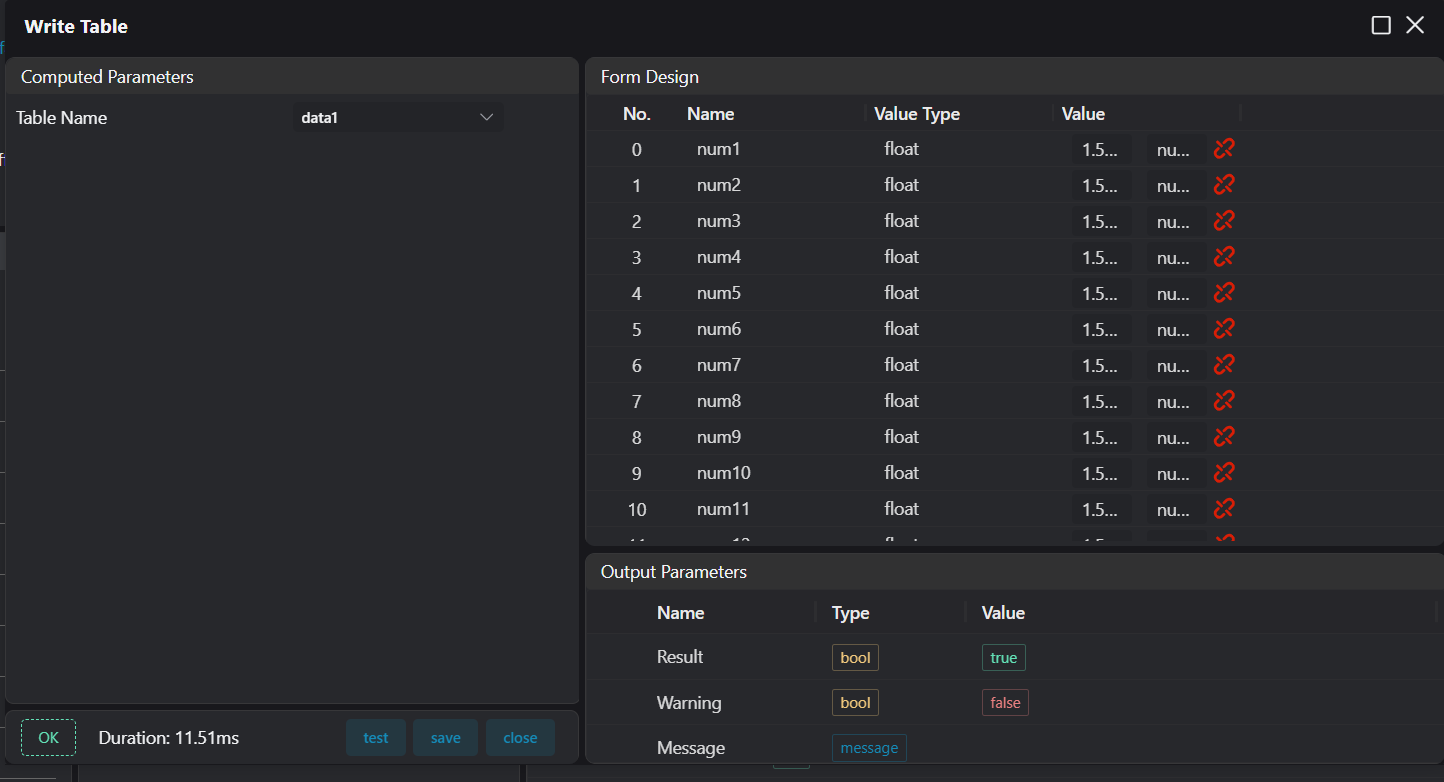
4. Save Results to Database and CSV File
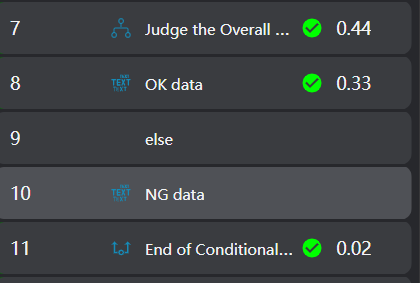
Select the Conditional Branch tool to judge whether it is NG. If it is OK, use the 3D Data Display tool to display OK, otherwise display NG.
Use the Lua Script tool to extract data from the string.
local numTable = {}
for num_str in string.gmatch(str, "%d+%.?%d*") do
    table.insert(numTable, tonumber(num_str))
end

for i = 1, #numTable do
    local varName = "num" .. i
    local value = numTable[i]
    SetFloatVariable(varName, value)
endUse the Write to CSV tool to save data.
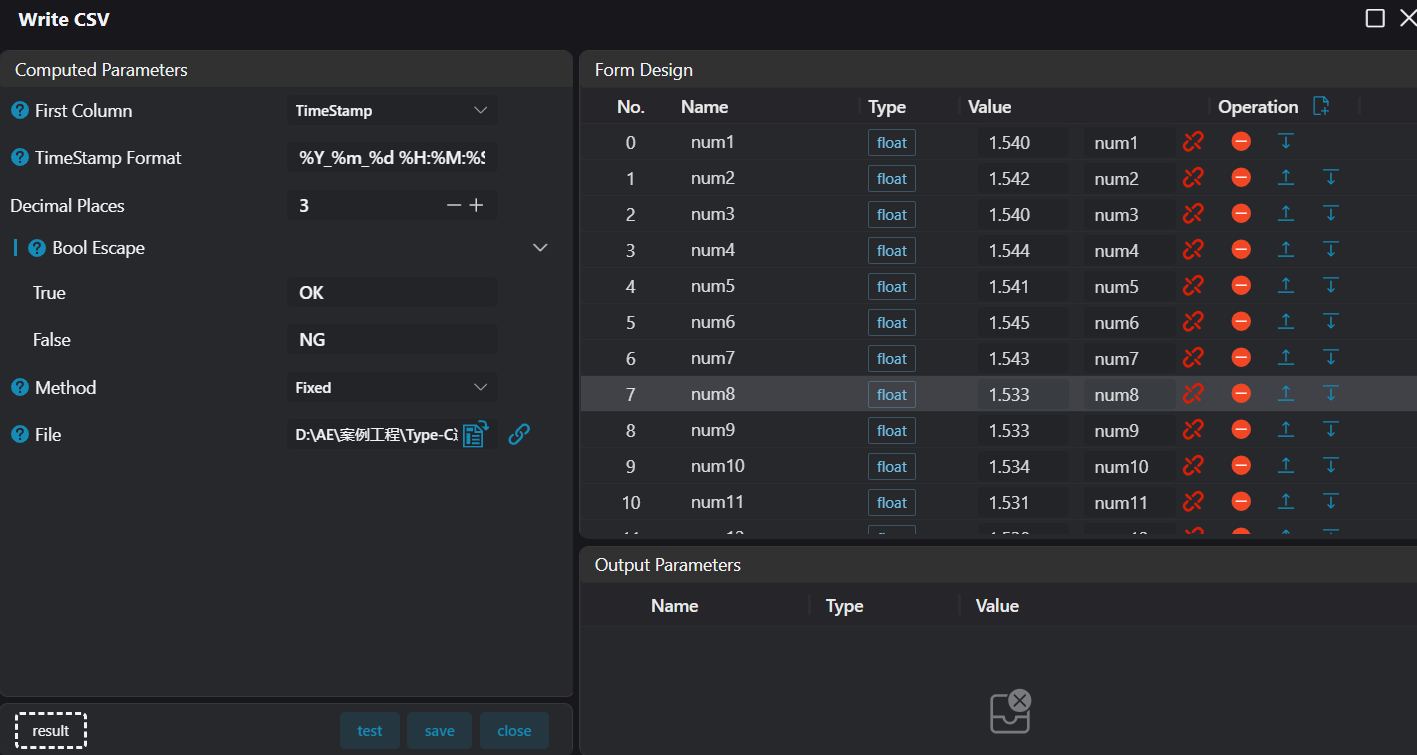
Use the Write to Data Table tool to save data.