Script Loop
Project Flow
1. Initialization
- Select the
Lua Language Scripttool, and initialize two global variables to store the current row and column of the loop.
-- Set global variables to store the current row and column
SetVariable("Column", 0)
SetVariable("Loop", 0)- Use the
Load Point Cloud Toolto load the point cloud image to be processed.
2. Preprocessing
Plane Fitting
Use the
3D Region Toolto select the region for plane fitting.Use the
3D Plane Tool, bind the variable region output by the operator in the previous step as the input region, fit the plane, and set it as the zero plane.
3. Script Loop for Pin Height Measurement
Use the
3D Clippingtool to clip the region of the Pin to be measured.Use the
3D Transformationtool to rotate the Pin region.Use the
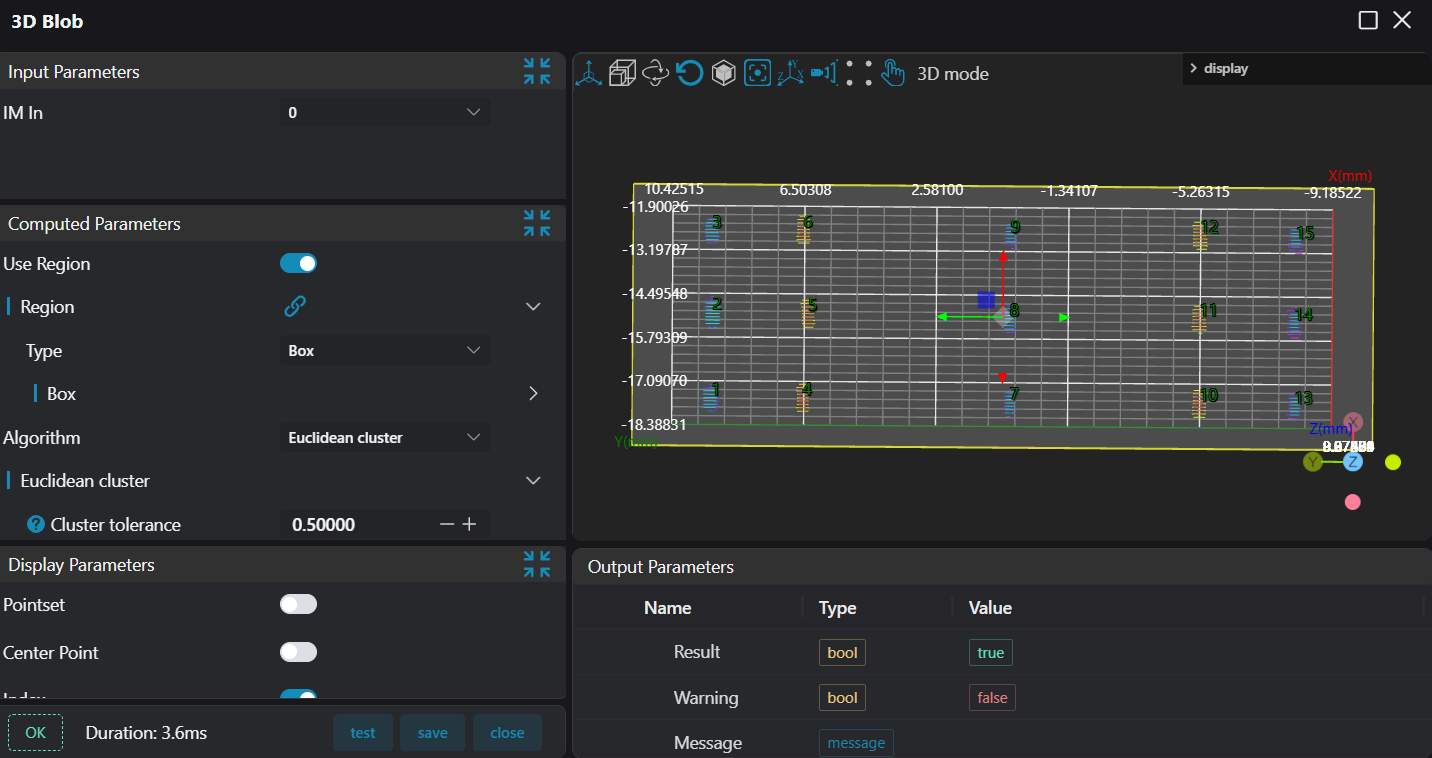
3D Blobtool to frame the required Pins and obtain the position information of each Pin.
Select the
Markertool, set the name toloopColumn, and use it as the row loop jump point.Select the
Lua Language Scripttool, bind the Pin center position information output by the3D Blobtool and name itblob. Set the current column number toLoop = 0, obtain the current row number, get the starting point coordinates of this row, and save them toStartColumn.
-- Set the column number to zero, starting from the first Pin of a new row.
SetIntVariable("Loop", 0)
-- Get the current row number
Column = GetVariable("Column")
-- Get the coordinates of the starting point of the current row
x = blob[Column + 1].X
y = blob[Column + 1].Y
z = blob[Column + 1].Z
-- Assign the starting point coordinates to "StartColumn"
SetPoint3D("StartColumn", x, y, z)Select the
Markertool, set the name toloopPin, and use it as the column loop jump point.Select the
Lua Language Scripttool, set the start and end coordinates of the box to 0, bind the row start point coordinates output by the Lua script tool in Step 5 and assign them tocs_x,cs_y,cs_z, get the current column number, perform arraying based on the spacing between two Pins, and then push the box data to the operator output variable.
pcb_pinsx1 = 0
pcb_pinsy1 = 0
pcb_pinsz1 = 0
pcb_pinex1 = 0
pcb_piney1 = 0
pcb_pinez1 = 0

Loop = GetVariable("Loop")

-- 2.5 and 0.5 can be adjusted freely according to the on-site device drawings; the data here has no actual reference significance
pcb_pinsx1 = cs_x + Loop * 2.5 - 0.5
pcb_pinex1 = cs_x + Loop * 2.5 + 0.5
pcb_pinsy1 = cs_y - 0.8
pcb_piney1 = cs_y + 0.8
pcb_pinsz1 = cs_z - 0.1
pcb_pinez1 = cs_z + 0.6


-- Push the box position information to the register for height measurement
SetBox("box1", pcb_pinsx1, pcb_pinsy1, pcb_pinsz1, pcb_pinex1, pcb_piney1, pcb_pinez1)
DrawBox(0, "green", pcb_pinsx1, pcb_pinsy1, pcb_pinsz1, pcb_pinex1, pcb_piney1, pcb_pinez1)Select the
3D Heighttool, bind the output variable (box) of the Lua script tool in the previous step as the region to be measured, and measure the height.Select the
Lua Language Scripttool to judge the number of rows and columns. When the column number is less than 3, jump to theloopPinmarker; when the column number is equal to 3, jump to theloopColumnmarker; when the row number is equal to 5, jump to theEndmarker.
-- Loop judgment
Loop = GetVariable("Loop") + 1
if Loop == 3 then
    Column = GetVariable("Column") + 1
    SetIntVariable("Column", Column)
    if Column < 5 then
    -- Loop for 5 rows
        Jump("loopColumn")
    else
        Jump("End")
    end
elseif Loop < 3 then
    -- Inner loop of the row
    Jump("loopPin")
end

SetIntVariable('Loop', Loop)- Select the
Markertool, set the name toEnd, and use it as the loop termination jump point.